


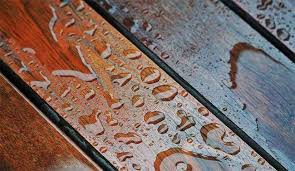
Waterproofing wood is an essential step for any wooden furniture, decking, or structure exposed to the elements. Not only does waterproofing extend the life of wood by protecting it from moisture and decay, but it also helps maintain its appearance and strength. Whether you’re dealing with a brand new project or revitalizing old wooden items, this step-by-step guide will walk you through the process of waterproofing wood easily and effectively.
Step 1: Choose the Right Wood
If you’re starting a new project, selecting the right type of wood can make a big difference. Woods like cedar, teak, and redwood have natural resistance to moisture and decay, but they can still benefit from additional waterproofing for long-term protection.
Step 2: Prepare the Surface
Proper preparation is key to ensuring that the waterproofing application is successful:
- Cleaning: Begin by cleaning the wood to remove dirt, grime, and any old finishes. A stiff brush and a mild detergent solution can be used for this purpose.
- Sanding: Once the wood is dry, sand the surface with medium-grit sandpaper (around 120-grit) to remove any imperfections and provide a smooth base for the waterproofing. For the best results, finish with fine-grit sandpaper (around 220-grit).
- Dust Removal: Remove all sanding dust with a tack cloth or a damp rag to ensure a clean surface for the sealant to adhere to.
Step 3: Apply a Waterproofing Sealant
Choosing the right sealant depends on the type of wood and the specific environmental conditions it will face:
- Water-Based Sealants: These are easier to clean up and less toxic but may need more frequent reapplication.
- Oil-Based Sealants: These penetrate deeper into the wood, providing longer-lasting protection but require more careful handling due to their toxic fumes.
Apply the sealant using a natural bristle brush, a roller, or a spray system, depending on the product instructions and your preference. Make sure to cover all surfaces evenly, including ends and joints.
Step 4: Allow Adequate Drying Time
Consult the sealant’s label for specific drying times. Generally, it’s best to allow the sealant to dry for at least 24 hours before exposing the wood to moisture. Avoid applying the sealant in direct sunlight or in damp conditions to ensure it cures properly.
Step 5: Add Additional Coats
For the best protection, apply at least two coats of sealant, especially in high-moisture areas or for wood that will be directly exposed to the elements. Allow the first coat to dry completely according to the manufacturer’s instructions before applying the second coat.
Step 6: Regular Maintenance
To maintain the waterproofing effectiveness:
- Regular Checks: Inspect the wood periodically for signs of wear or damage, and check the waterproofing layer for any cracks or peeling.
- Clean Regularly: Keep the wood clean from dirt and debris, which can trap moisture and lead to decay.
- Reapply Sealant: Depending on exposure to elements and the type of sealant used, you might need to reapply a coat every few years to maintain optimal protection.
Conclusion
Waterproofing wood is a straightforward process that can significantly extend the life and beauty of your wood projects. By carefully selecting the right materials, preparing the surface, and applying a quality sealant, you can protect your wood from moisture-induced damage and enjoy it for many years to come. Regular maintenance will ensure that your wood remains protected and continues to look great, regardless of the weather conditions it faces.


